How to Add a Location
Note: In order to add a location, the role of the logged-in user must include edit access to the Locations feature.
You are able to add a location from the Manage Locations form. Once added, the new location is available for performing inventory counts and inventory moves. To add a location, refer to the steps below.
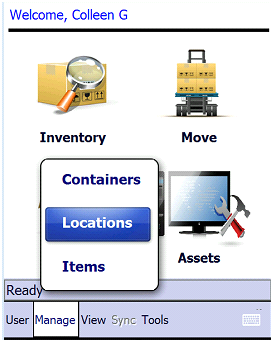
- Select Manage > Locations from the menu bar to reach the Manage Locations form.
- At the Manage Locations form, select the Add icon.
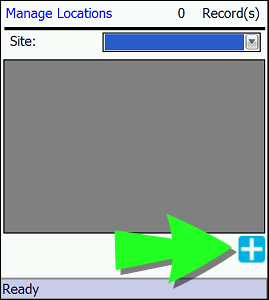
- The Add Location form appears.
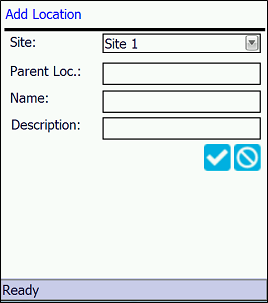
- Site: the new location will be added to the site selected in this field. The logged-in user's default site is automatically placed in the Site field. The site selections that are available will be based on the sites that the logged-in user has access to.
- Parent Loc field: If this new location is a sublocation, enter the parent location name in the Parent Loc field. (To enter a sublocation, the Site must allow sublocations.)
- Name: enter the name of the new location in the Name field.
- Description: enter the location description in the Description field. (The Description field is not required.)
- Select the
 Save icon to add the new location to the application. (To cancel adding this location, select the
  Cancel icon.)
 - Once added, you are able to include the location in inventory counts and in inventory moves.
- RF Mode: The site-location is immediately added to the main database.
- Batch Mode: The site-location is added to the mobile database; it will be incorporated into the main database after the data is uploaded to the main IntelliTrack application.